Intro and Brief Recap
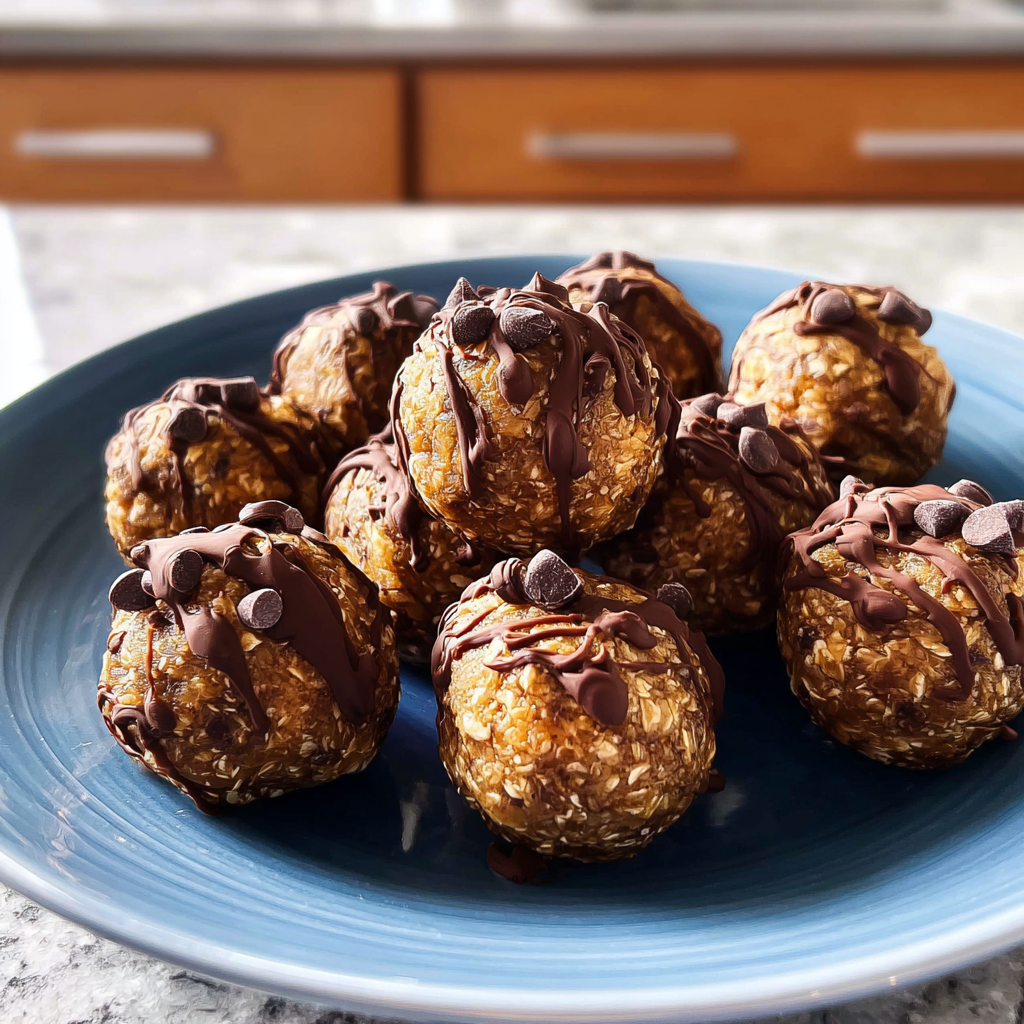
Have you ever craved a sweet treat that’s not only delicious but also packed with nutrients? No-Bake Chocolate Peanut Butter Protein Balls are the answer. These little bites of heaven offer a rich chocolatey flavor complemented by the creamy texture of peanut butter, making them an irresistible snack. With just a few simple ingredients, you can whip up this delightful treat in no time.
These energy-packed protein balls are perfect for any occasion, whether you need a quick pick-me-up during your workday or a post-workout snack. Imagine sinking your teeth into one of these morsels; the combination of chocolate and peanut butter creates a mouthwatering experience that satisfies your sweet tooth while providing lasting energy. Plus, they are super easy to prepare—no baking required!
Key Ingredients For No-Bake Chocolate Peanut Butter Protein Balls
Here’s what you’ll need to make this delicious dish:
- Rolled Oats: Use old-fashioned rolled oats for the best texture; they provide the base for these protein balls and offer fiber to keep you full.
- Peanut Butter: Choose natural, creamy peanut butter for a smooth consistency; it adds flavor and healthy fats.
- Honey or Maple Syrup: Either acts as a natural sweetener and binder; adjust the quantity based on your sweetness preference.
- Cocoa Powder: Unsweetened cocoa powder gives these protein balls their rich chocolate flavor; opt for high-quality cocoa for the best taste.
- Protein Powder: Use your favorite protein powder to boost the nutritional content; vanilla or chocolate-flavored powders work well.
The full ingredients list, including measurements, is provided in the recipe card directly below.
Instructions For No-Bake Chocolate Peanut Butter Protein Balls
Follow these simple steps to prepare this delicious dish:
First Step : Prepare Your Ingredients
Gather all your ingredients on a clean countertop. This will streamline your process and make sure you don’t forget any key components.
Second Step : Mix Dry Ingredients
In a large bowl, combine rolled oats, cocoa powder, and protein powder. Stir well until all dry ingredients are fully blended.
Third Step : Add Wet Ingredients
Next, add peanut butter and honey or maple syrup to the mixture. Use a spatula to mix everything together until it forms a sticky dough-like consistency.
Fourth Step : Form the Balls
Wet your hands slightly to prevent sticking. Take small portions of the mixture and roll them into bite-sized balls, about one inch in diameter.
Fifth Step : Chill
Place the protein balls on a parchment-lined tray and refrigerate them for at least 30 minutes. Chilling helps them firm up for easier handling.
Transfer to plates or serve directly from the fridge for an energizing treat.
Expert Tips
Here are some helpful tips to ensure the best results for your dish:
- Customize Flavors: Feel free to add ingredients like chopped nuts, dried fruits, or dark chocolate chips for extra texture and flavor.
- Store Properly: Keep these protein balls in an airtight container in the fridge for up to one week for maximum freshness.
- Experiment with Sweeteners: If you’re looking for sugar-free alternatives, try using stevia or erythritol as substitutes.
Preparation Steps
To make No-Bake Chocolate Peanut Butter Protein Balls, start by gathering all your ingredients. In a mixing bowl, combine oats, protein powder, peanut butter, honey, and cocoa powder. Stir the mixture until it forms a sticky dough. If you prefer a sweeter taste, consider adding a little more honey or a dash of vanilla extract. Once combined, use your hands to roll the mixture into small balls. Each ball should be about one inch in diameter. Place the balls on a baking sheet lined with parchment paper. After forming all the balls, refrigerate them for at least 30 minutes to firm up.
Storage Tips
These No-Bake Chocolate Peanut Butter Protein Balls can last up to one week when stored properly. To keep them fresh for longer, place them in an airtight container in the refrigerator. You can also freeze them for up to three months if you want to prepare in advance. Just ensure to separate each ball with parchment paper before freezing to prevent sticking.
Nutritional Benefits
No-Bake Chocolate Peanut Butter Protein Balls offer several nutritional benefits. They are rich in protein from the protein powder and peanut butter, making them ideal for post-workout recovery or a healthy snack option. The oats provide complex carbohydrates that help sustain energy levels throughout the day. Additionally, cocoa powder adds antioxidants while keeping the treat deliciously chocolatey.
Presentation Ideas
This No-Bake Chocolate Peanut Butter Protein Balls is versatile and pairs wonderfully with:
- Fresh fruits: Serve alongside sliced bananas or strawberries for added freshness.
- Yogurt: Pair them with Greek yogurt for a balanced snack or breakfast option.
- Coconut flakes: Roll some balls in shredded coconut for an extra layer of flavor and texture.
FAQs
What are No-Bake Chocolate Peanut Butter Protein Balls?
No-Bake Chocolate Peanut Butter Protein Balls are delicious snacks made without baking. They primarily consist of oats, peanut butter, honey, cocoa powder, and protein powder. These ingredients combine to create a nutritious treat that’s perfect for on-the-go snacking or post-exercise recovery.
Can I customize my No-Bake Chocolate Peanut Butter Protein Balls?
Absolutely! You can easily customize your No-Bake Chocolate Peanut Butter Protein Balls according to your taste preferences or dietary needs. Consider adding ingredients like chia seeds for extra fiber or mini chocolate chips for sweetness. You can also substitute almond butter for peanut butter if you’re looking for a nut-free option.
How long do I need to refrigerate my No-Bake Chocolate Peanut Butter Protein Balls?
Refrigerating your No-Bake Chocolate Peanut Butter Protein Balls for at least 30 minutes is essential to help them firm up properly. This chilling time allows the ingredients to bind well together, resulting in firmer and easier-to-handle protein balls.
Are No-Bake Chocolate Peanut Butter Protein Balls healthy?
Yes! No-Bake Chocolate Peanut Butter Protein Balls are generally considered healthy due to their nutrient-dense ingredients. They provide a good balance of protein, healthy fats, and fiber which can support energy levels and overall health. However, moderation is key since they do contain natural sweeteners like honey and can be calorie-dense if consumed in large quantities.
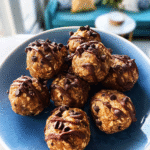
No-Bake Chocolate Peanut Butter Protein Balls
- Prep Time: 10 minutes
- Cook Time: 0 minutes
- Total Time: 10 minutes
- Yield: About 12 servings 1x
- Category: Snack
- Method: No-Bake
- Cuisine: American
Description
Indulge in a nutritious treat with these No-Bake Chocolate Peanut Butter Protein Balls. Combining the rich flavors of chocolate and creamy peanut butter, these energy-packed snacks are perfect for a quick pick-me-up or post-workout recovery. With minimal ingredients and no baking required, you can whip up a batch in no time. Enjoy the satisfying taste while fueling your body with protein, fiber, and healthy fats.
Ingredients
- 1 cup rolled oats
- 1/2 cup natural creamy peanut butter
- 1/3 cup honey or maple syrup
- 1/4 cup unsweetened cocoa powder
- 1/2 cup protein powder (vanilla or chocolate)
Instructions
- Gather all ingredients on a clean countertop.
- In a large bowl, mix rolled oats, cocoa powder, and protein powder until well combined.
- Add peanut butter and honey (or maple syrup) to the dry mixture. Stir until it forms a sticky dough.
- Slightly wet your hands to prevent sticking, then roll the mixture into 1-inch balls.
- Place the protein balls on a parchment-lined tray and refrigerate for at least 30 minutes to firm up.
Nutrition
- Serving Size: 1 ball (30g)
- Calories: 120
- Sugar: 8g
- Sodium: 50mg
- Fat: 6g
- Saturated Fat: 1g
- Unsaturated Fat: 5g
- Trans Fat: 0g
- Carbohydrates: 15g
- Fiber: 2g
- Protein: 5g
- Cholesterol: 0mg
Keywords: Customize your protein balls by adding ingredients like chopped nuts, dried fruits, or dark chocolate chips for extra flavor. Store in an airtight container in the fridge for up to one week or freeze for up to three months.

Leave a Comment