Intro and Brief Recap
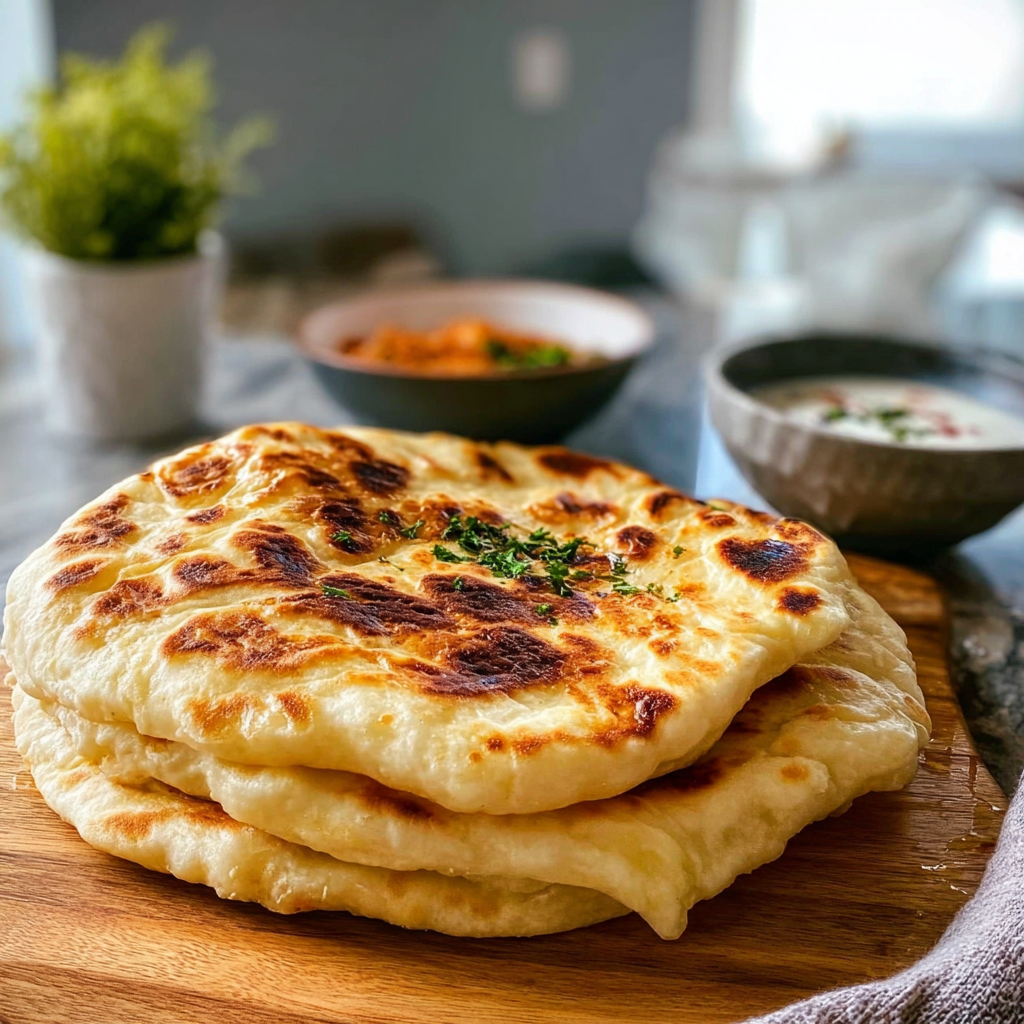
Have you ever wondered how to create the perfect, fluffy Homemade Pita Bread that puffs up beautifully in the oven? Imagine pulling a warm, soft pita from your kitchen, its golden-brown exterior giving way to a tender interior just waiting to be filled with your favorite ingredients. The aroma wafts through the air, inviting everyone to gather around the table for a taste of this delightful treat.
Making Homemade Pita Bread is not just about crafting a flatbread; it’s about creating lasting memories. I remember the first time I baked pita bread in my kitchen, filled with excitement as I watched each piece puff up in the oven. Pita bread is perfect for family gatherings, casual dinners, or even an adventurous picnic. Its versatility shines when paired with various dips or stuffed with savory fillings. This recipe promises to deliver an amazing flavor experience that will have you coming back for more.
Key Ingredients For Homemade Pita Bread
Here’s what you’ll need to make this delicious dish:
- All-Purpose Flour: A staple in most kitchens, all-purpose flour provides the right texture for soft and fluffy pita bread.
- Warm Water: Use water heated to about 110°F (43°C) to activate the yeast effectively.
- Active Dry Yeast: This ingredient helps the dough rise, creating those characteristic pockets in the pita.
- Olive Oil: Adding olive oil enriches the dough and improves its elasticity.
- Salt: A pinch of salt enhances flavor and balances the sweetness of the dough.
The full ingredients list, including measurements, is provided in the recipe card directly below.
Instructions For Homemade Pita Bread
Follow these simple steps to prepare this delicious dish:
First Step : Prepare Your Dough
In a large mixing bowl, combine warm water and active dry yeast. Let it sit for about 5 minutes until it becomes frothy. Add olive oil and salt to the mixture before gradually incorporating all-purpose flour until a dough begins to form.
Second Step : Knead the Dough
Transfer your dough onto a floured surface and knead it for about 8-10 minutes until smooth and elastic. If necessary, add more flour if the dough feels too sticky.
Third Step : Let It Rise
Place the kneaded dough into a lightly greased bowl, cover it with a damp cloth or plastic wrap, and let it rise in a warm area for approximately 1 hour or until doubled in size.
Fourth Step : Shape Your Pitas
Once risen, punch down the dough gently to release air. Divide it into equal portions and shape each portion into balls. Roll out each ball into circles about ¼ inch thick on a lightly floured surface.
Fifth Step : Preheat Your Oven
Preheat your oven to 475°F (245°C). If using a baking stone or baking sheet, place it inside while preheating for at least 30 minutes.
Sixth Step : Bake the Pitas
Carefully place rolled-out pitas onto the hot baking stone or sheet. Bake for about 3-5 minutes or until they puff up and turn lightly golden. Transfer them to a towel-lined plate to keep warm.
Transfer to plates and fill with your choice of ingredients for an unforgettable meal.
Expert Tips
Here are some helpful tips to ensure the best results for your dish:
- Use Fresh Yeast: Always check expiration dates on your yeast packages for optimal rising action.
- Kneading Technique: Knead firmly but gently; over-kneading can lead to tough bread.
- Monitor Oven Temperature: Ensure your oven reaches full temperature before baking for best puffing results.
Presentation Ideas
This Homemade Pita Bread is versatile and pairs wonderfully with:
- Hummus: Serve your warm pita alongside a bowl of creamy hummus for a delightful appetizer or snack. The soft texture of the bread complements the smoothness of the hummus perfectly.
- Fresh Vegetables: Slice fresh cucumbers, tomatoes, and bell peppers to create a refreshing veggie platter. The crunchiness of the vegetables contrasts beautifully with the softness of the pita.
- Grilled Meats: Stuff your homemade pita with grilled chicken, beef, or lamb for a hearty meal. The pita serves as a perfect vessel to hold all the delicious flavors.
How to Store Homemade Pita Bread
To keep your Homemade Pita Bread fresh, store it in an airtight container at room temperature for up to three days. If you want to extend its shelf life, consider freezing it. Place layers of parchment paper between each pita before sealing them in a freezer bag. When ready to eat, simply thaw at room temperature or warm in the oven.
Pita Bread Variations
You can experiment with different combinations when making homemade pita bread. Try adding herbs like rosemary or thyme into the dough for an aromatic twist. For a whole grain option, substitute half of the all-purpose flour with whole wheat flour. This gives your homemade pita a nutty flavor and boosts its nutritional value.
Common Mistakes to Avoid
When crafting your Homemade Pita Bread, there are a few common pitfalls to watch out for. One major mistake is not letting the dough rise adequately; this can lead to dense pitas that don’t puff up. Make sure to warm your water slightly and allow yeast enough time to activate fully before combining it with other ingredients.
Nutritional Benefits
Homemade Pita Bread offers several health benefits compared to store-bought options. By using simple ingredients like flour and water, you can avoid preservatives and additives found in many commercial breads. Additionally, making your own allows you to control portion sizes and choose healthier flours if desired.
FAQs:
Can I make Homemade Pita Bread ahead of time?
Yes, you can prepare Homemade Pita Bread in advance. After baking, allow them to cool completely before storing them in an airtight container at room temperature for up to three days. Alternatively, freeze the pitas for longer storage; just be sure to separate them with parchment paper for easy access later.
What is the best flour for making Homemade Pita Bread?
The best flour for making Homemade Pita Bread is all-purpose flour due to its balanced protein content that creates a soft texture. However, you can experiment with whole wheat flour or even gluten-free alternatives if desired. Just note that adjustments may be needed in hydration levels based on the type of flour used.
How do I know when my Homemade Pita Bread is done baking?
Your Homemade Pita Bread is done baking when it has puffed up nicely and has a light golden color on both sides. Typically, this takes about five minutes in a hot oven at around 475°F (245°C). Keep an eye on them as they bake since they can go from perfect to overdone quickly.
Can I use my Homemade Pita Bread for sandwiches?
Absolutely! Homemade Pita Bread is perfect for making sandwiches thanks to its pocket-like structure. You can fill it with various ingredients such as grilled meats, veggies, cheeses, or spreads like tzatziki sauce and avocado for deliciously portable meals.

Homemade Pita Bread
- Prep Time: 15 minutes
- Cook Time: 10 minutes
- Total Time: 25 minutes
- Yield: Approximately 6 servings 1x
- Category: Main
- Method: Baking
- Cuisine: Mediterranean
Description
Homemade Pita Bread is a delightful flatbread that puffs up to create soft, airy pockets perfect for filling with your favorite ingredients. This versatile bread is an excellent addition to any meal, whether served alongside dips like hummus or stuffed with savory meats and veggies. With simple ingredients and straightforward steps, you can enjoy fresh pita straight from your oven, elevating family dinners or casual gatherings.
Ingredients
- 2 cups all-purpose flour
- 1 cup warm water (110°F/43°C)
- 2 tsp active dry yeast
- 2 tsp olive oil
- 1 tsp salt
Instructions
- In a mixing bowl, combine warm water and active dry yeast. Let sit for 5 minutes until frothy.
- Stir in olive oil and salt, then gradually add flour until a dough forms.
- Knead on a floured surface for 8-10 minutes until smooth and elastic.
- Place dough in a greased bowl, cover, and let rise in a warm area for about 1 hour or until doubled in size.
- Punch down the risen dough, divide it into balls, and roll each into circles about ¼ inch thick.
- Preheat your oven to 475°F (245°C) with a baking stone or sheet inside for at least 30 minutes.
- Bake the rolled-out pitas on the hot stone/sheet for 3-5 minutes until puffed and lightly golden.
Nutrition
- Serving Size: 1 pita (60g)
- Calories: 165
- Sugar: 0g
- Sodium: 200mg
- Fat: 3g
- Saturated Fat: 0.5g
- Unsaturated Fat: 2g
- Trans Fat: 0g
- Carbohydrates: 31g
- Fiber: 1g
- Protein: 5g
- Cholesterol: 0mg
Keywords: Use fresh yeast for optimal results. Experiment with adding herbs like rosemary or thyme for extra flavor. Store leftovers in an airtight container at room temperature for up to three days or freeze with parchment paper between them.


Leave a Comment